Hello, old friends.
Life looks a lot different now than it did when I first started this blog! With 2 kids, a dog, a house in the suburbs, and a full-time job, my free time is at a premium. So when I do have the chance/energy to enjoy a cocktail at home, I want it to feel extra special. Like a little celebration in a glass.
So this is less of a full-blown cocktail gift guide and more of a My Recent Favorites type of list. Cheers!
🍐 Slightly Impeared Spirits
Hot take: Pear Jelly Bellies actually taste like pear. And pear liquors and liqueurs are some of the few alcoholic beverages that manage to retain an essence that’s pretty true to the flavor of the fruit.
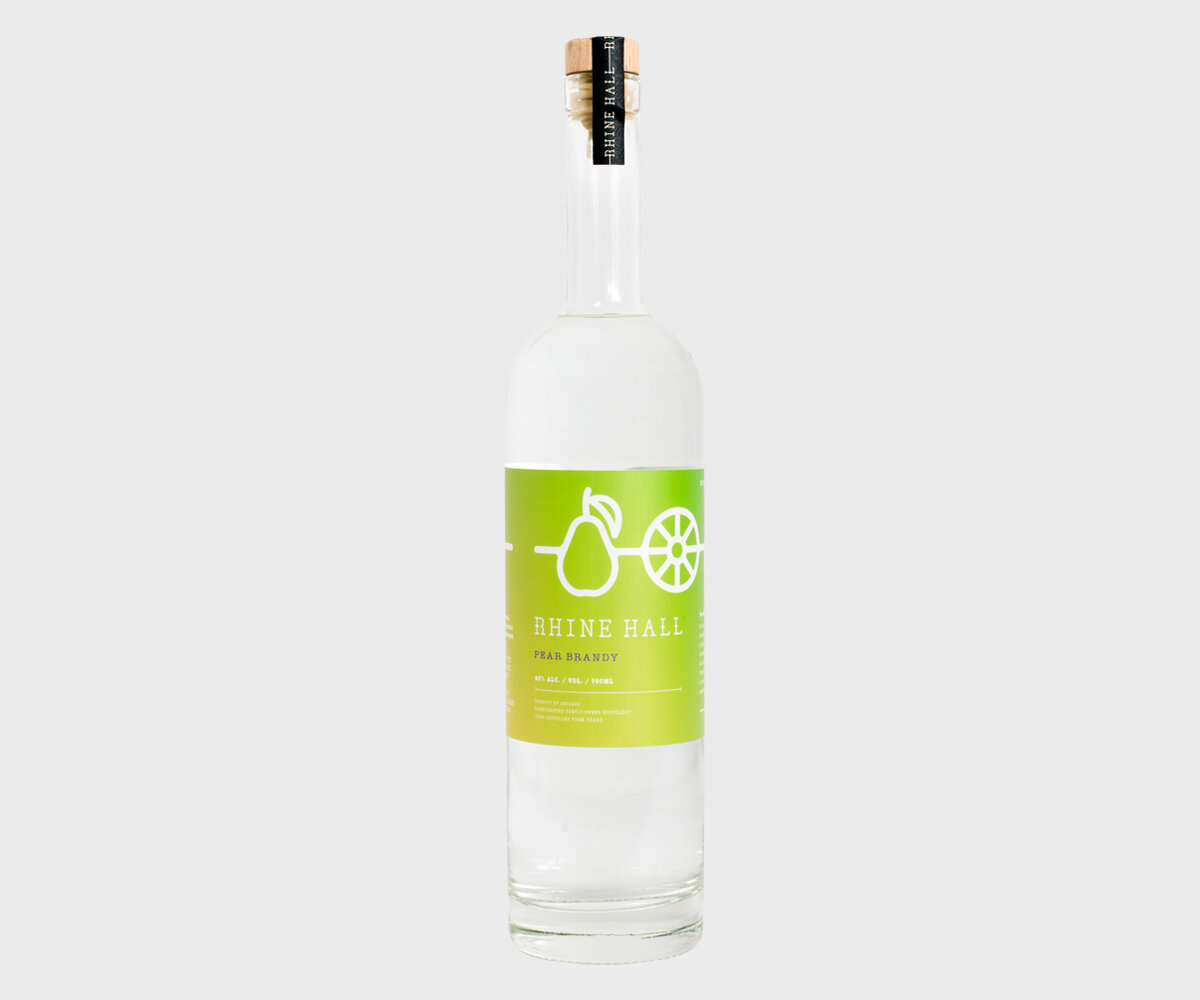
I’ve loved pear brandy ever since I was a regular at Rhine Hall Distillery in Chicago. Their pear brandy is my favorite. But it’s not available most places (even in Chicagoland it can be hard to find). I recently found Bozic’s Imports Williams Pear Brandy at Binny’s and it was a solid replacement.

Another pear liqueur I’m into lately is Spiced Pear from St. George Spirits. We used this in a punch for Thanksgiving and it was a runaway hit.
My Favorite Pear Cocktails to Try
- Shadow Woman
- Sparkling Pear Punch
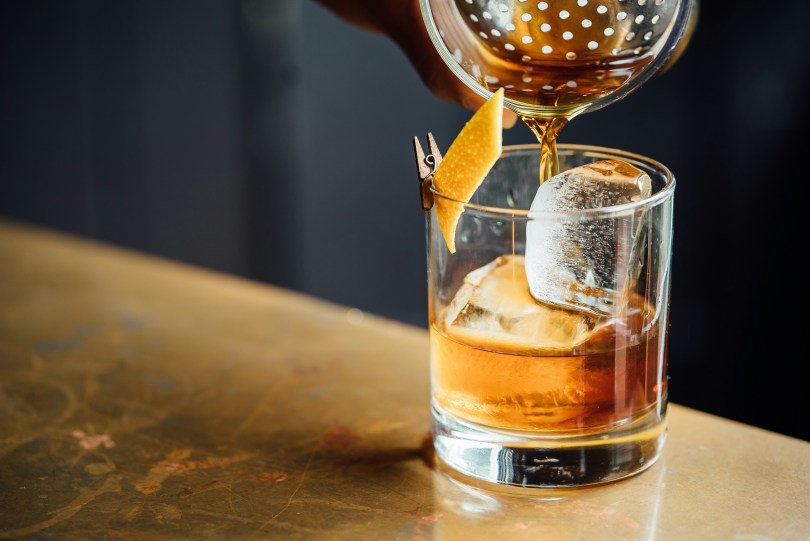
- Spiced Pear Old-Fashioned
- Pear Daiquiri: 2 oz. pear brandy + 3/4 oz. lime juice + 3/4 oz. simple syrup
🥃 Crack One Open
Oh, how far canned cocktails have come in the past decade. Gone are the days when neon Buzz Balls ruled the liquor store counter.
Since I like making my own cocktails at home, I rarely opt for ready-to-drink canned cocktails, but sometimes you can’t beat the convenience. If I DO buy a canned cocktail, I try to look for one that’s 1). Not a sugar bomb and 2). made with real spirits.


I was pleasantly surprised* by both the Rock and Rye Old-Fashioned and the Coffee Old-Fashioned from Hochstadter’s Slow & Low. Both varieties come in 750 ml bottles (~$24.99) and 4-packs of 100 ml cans (~$19.99).
The Rock and Rye-Old Fashioned was honestly as good as one we’d make at home from scratch—dry but round. I poured one can over a big ice cube and garnished it with an orange peel.
The Coffee Old-Fashioned packs quite a punch in flavor thanks to the Intelligentsia used in the recipe, and it’s nice change of pace from the sometimes-too-sweet espresso martinis that are trending.
*Full disclosure, Hochstadter’s sent me a couple cans to try, but I’d never write about a product if I didn’t REALLY like it!
🤘Knock Your Rocks Off
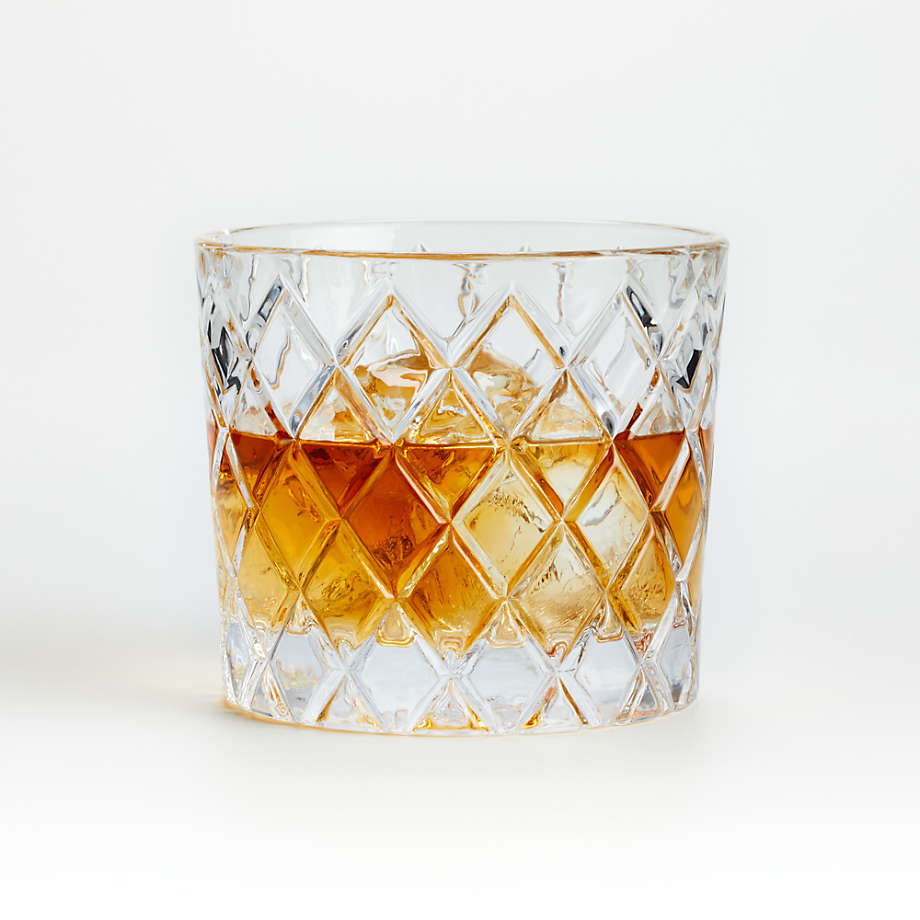
We first spotted these gorgeous rocks glasses at the aforementioned Rhine Hall and figured they’d be super bougie and expensive. “They’re pretty cheap at Crate & Barrel,” the bartender said, and she was right!
At $5.95 per glass, these Hatch 11-ounce Double Old Fashioned Glasses look timeless and refined, but you can get a set of 4 or more without breaking the bank. The glass is designed with an etched diamond pattern to resemble cut crystal, but they’re actually made of glass and dishwasher-safe.
🍸Shaken & Stirred

Every home bar needs a good Boston shaker. It gives you an airtight seal and it’s easy to clean and fun to use.
Ours is the weighted stainless steel shaker from A Bar Above, and it’s been going strong for several years now. There’s a bit of a learning curve to learn how to break the seal, but if I can figure it out, you can, too.

For cocktails that should be stirred, like a Manhattan, Martini, or Negroni, you’re going to want a pretty lil mixing glass. This one is only $9.95 and comes from the same Hatch collection as the rocks glass from Crate and Barrel.
What did I miss? Is there anything special you like to mix up for the holidays?